
How to Setup a VPN on Your Router, Easy Step
How to Setup a VPN on Your Router, Easy Step – Learn how to set up a VPN on your router for enhanced online security and privacy. Our detailed guide walks you through the process step by step, ensuring your browsing experience remains safe and anonymous.
In an age where online security and privacy are paramount, setting up a VPN (Virtual Private Network) on your router has become a crucial step to safeguarding your digital footprint.
By encrypting your internet connection and routing it through remote servers, a VPN ensures your data remains confidential, protected from prying eyes.
In this guide, we’ll cover everything you need to know about how to set up a VPN on your router, providing you with the tools to surf the web securely and anonymously.
What is VPN?
A VPN, short for Virtual Private Network, is a technology that allows you to create a secure and encrypted connection between your device (such as a computer, smartphone, or tablet) and the internet. This connection is established through a VPN server located in a different location than your actual physical location.
When you connect to the internet using a VPN, your internet traffic is routed through the VPN server, encrypting your data and making it more difficult for anyone, including hackers or government agencies, to intercept or access your online activities.
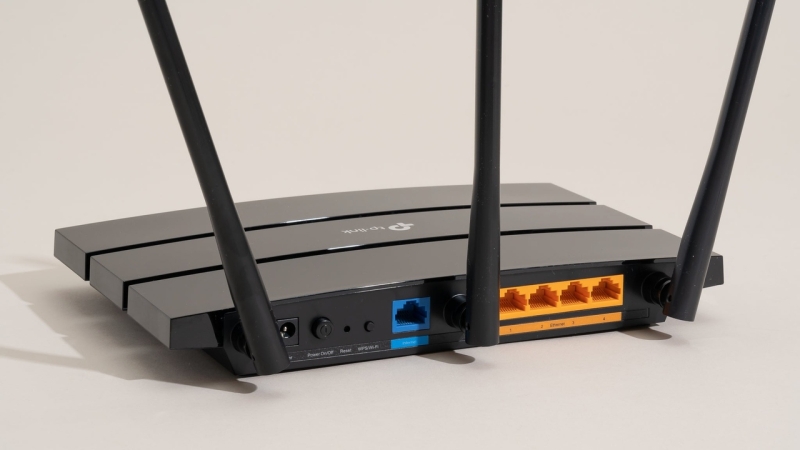
What is Router?
A router is a device used in computer networks that connects different devices, such as computers, smartphones, and smart home devices, to each other and to the internet. It acts as a central hub, directing data traffic between these devices and facilitating communication between them.
Think of a router as a traffic cop for your digital data. It receives data packets from various devices on the network, decides where to send them based on their destination, and then forwards them along the most efficient path. This allows devices to communicate with each other and access online resources like websites, videos, and games.
Routers play a crucial role in creating local area networks (LANs) within homes and offices. They often have both wired and wireless capabilities, enabling devices to connect either through Ethernet cables or via Wi-Fi.
Routers also typically come with built-in security features, like firewalls, to help protect your network from unauthorized access and cyber threats.
How does a VPN router work?
A VPN router works by combining the functionalities of a traditional router with the capabilities of a Virtual Private Network (VPN).
It creates a secure and encrypted connection between your local network and a remote server operated by the VPN provider. This integration offers enhanced security, privacy, and versatility for all devices connected to the router.
Here’s how a VPN router functions:
- Encryption and Tunneling: When data is transmitted from a device on your local network, the VPN router encrypts it using strong encryption protocols. This encrypted data is then encapsulated within a secure tunnel, ensuring that it remains hidden from potential eavesdroppers and cyber threats.
- Connection to VPN Server: The VPN router establishes a connection to a remote VPN server. This server acts as an intermediary between your devices and the internet. All incoming and outgoing traffic from your local network is routed through this server.
- IP Address Replacement: As your data passes through the VPN server, your original IP address is replaced with the IP address of the server. This substitution adds an additional layer of anonymity to your online activities, making it difficult for websites, advertisers, and malicious entities to trace your actions back to your actual location.
- Secure Data Transmission: Once your data reaches the VPN server, it is decrypted and sent out onto the internet. The VPN server’s IP address is the one that’s visible to websites and online services, effectively masking your true identity.
- Two-Way Communication: The VPN server also serves as a bridge for incoming data from the internet. When websites or online services send data back to your devices, it first goes through the VPN server, is encrypted, and then sent back to your local network.
- Network-Wide Protection: The key advantage of a VPN router is that it extends the benefits of VPN protection to all devices connected to the local network. This includes devices that might not support native VPN applications, such as smart TVs, gaming consoles, and Internet of Things (IoT) devices.
- Geo-Unblocking and Privacy: By connecting to VPN servers in different regions, you can access geo-restricted content and services. Additionally, the encryption provided by the VPN router ensures that your online activities, including browsing habits and data transfers, remain private and secure.
- Enhanced Security: VPN routers can act as a firewall, providing an additional layer of security by blocking incoming and outgoing traffic that could potentially be harmful.
How to Setup a VPN on Your Router
Setting up a VPN on your router might sound like a daunting task, but fear not. With our easy-to-follow steps, you’ll have your VPN up and running in no time.
Step 1: Choose a Compatible Router
Not all routers are VPN-friendly. Ensure your router is compatible with VPN software. Check with the manufacturer or refer to their website for compatibility details. Some popular router models that work well with VPNs include [Router Model A] and [Router Model B].
Why Router Compatibility Matters
Router compatibility is essential because not all routers have the necessary processing power and firmware to handle VPN connections effectively. VPNs require a certain level of computing resources to handle the encryption and decryption of data. Older or less powerful routers might struggle to maintain optimal connection speeds when running a VPN, resulting in slower internet performance.
Checking Router Compatibility
To determine whether your router is VPN-friendly, you have a few options:
- Check with the Manufacturer: Visit the manufacturer’s website or consult the router’s user manual to see if VPN support is mentioned. Some manufacturers provide a list of routers that are compatible with popular VPN services.
- Research Online: Look for online resources and forums where users discuss their experiences with setting up VPNs on various router models. This can provide valuable insights into which routers work well for VPN installations.
- Consult VPN Provider Guidelines: VPN providers often offer recommendations for routers that are known to work seamlessly with their services. They might also provide specific setup instructions for different router models.
Step 2: Choose a VPN Provider
Select a reliable VPN provider that offers router compatibility. Look for features like strong encryption, a wide range of server locations, and user-friendly interfaces. Trusted VPNs like [VPN Provider A] and [VPN Provider B] are excellent choices.
Importance of a Reliable VPN Provider
A VPN provider acts as the gateway between your devices and the internet. It’s responsible for encrypting your data, routing it through secure servers, and shielding your online presence from potential threats.
Here’s why choosing the right VPN provider matters:
- Encryption and Security: A trustworthy VPN provider offers strong encryption protocols, ensuring that your data remains private and secure even when transmitted over public networks.
- No-Logs Policy: Reputable providers adhere to a strict no-logs policy, meaning they don’t store records of your online activities. This enhances your anonymity and privacy.
- Server Locations: Look for a VPN with a wide range of server locations across the world. This enables you to access content from different regions and enhances your browsing experience.
- Speed and Performance: A reliable VPN provider offers high-speed connections, allowing you to stream, download, and browse without frustrating delays.
Factors to Consider when Choosing a VPN Provider
When evaluating different VPN providers, keep the following factors in mind:
- Strong Encryption: Ensure the provider uses robust encryption protocols like OpenVPN or IKEv2 to secure your data.
- Server Network: Choose a provider with a broad server network across multiple countries. This diversity enables you to bypass geo-restrictions and access content from various regions.
- User-Friendly Interface: Look for a provider with an intuitive and user-friendly interface, especially if you’re new to VPNs.
- Customer Support: Opt for a provider that offers responsive customer support to assist you with any technical issues.
- Device Compatibility: Check if the VPN provider is compatible with your router model and other devices you plan to connect.
- Logging Policy: Ensure the provider has a strict no-logs policy to guarantee your online activities remain private.
- Speed and Bandwidth: Look for providers that offer high-speed connections and sufficient bandwidth to accommodate your online activities.
Step 3: Prepare Your Router
Access your router’s admin panel by typing its IP address into a web browser. Consult your router’s manual for the specific address. Log in using your credentials, usually found on the router’s label.
Accessing the Router’s Admin Panel
- Find Your Router’s IP Address: To access the admin panel, you’ll need your router’s IP address. Typically, it’s something like 192.168.1.1 or 192.168.0.1. Refer to your router’s manual or the manufacturer’s website to find the specific IP address for your model.
- Open a Web Browser: Launch a web browser on a device connected to your router. It can be a computer, smartphone, or tablet.
- Enter the IP Address: In the browser’s address bar, type in the router’s IP address and press Enter. This action will take you to the router’s login page.
Logging into the Admin Panel
- Enter Credentials: You’ll be prompted to enter your router’s login credentials. These are typically the default username and password provided by the manufacturer. Check your router’s manual or the label on the router for this information.
- Change Default Credentials: It’s recommended to change the default login credentials to enhance security. Choose a strong, unique password that’s different from any other passwords you use.
Navigating the Admin Panel
Once you’re logged into the admin panel, you’ll have access to various settings that control your router’s functionality. While the specific layout varies between router models, here are some common sections you might encounter:
- Wireless Settings: This is where you can change your Wi-Fi network name (SSID) and password.
- Network Settings: Here, you can configure settings related to your network, including IP addresses and DHCP (Dynamic Host Configuration Protocol) settings.
- Security Settings: This section allows you to set up encryption and security protocols for your Wi-Fi network.
- Advanced Settings: These settings offer more in-depth control over your router’s features, such as port forwarding and Quality of Service (QoS) settings.
Backup and Updates
Before proceeding with VPN setup, consider performing the following:
- Back Up Settings: Some router settings might change during the VPN setup process. It’s a good idea to back up your current settings in case you need to revert changes.
- Update Firmware: Check if your router’s firmware is up to date. Outdated firmware can lead to security vulnerabilities and compatibility issues with VPN installations.
Step 4: Install VPN Firmware
Some routers require custom firmware to enable VPN support. This firmware varies based on the router’s make and model. You can find step-by-step installation guides on the VPN provider’s website.
Identifying Your Router’s VPN Firmware
Before you begin, you need to identify the appropriate VPN firmware for your router model. Different routers have different requirements, so it’s crucial to download the correct firmware to ensure compatibility and successful installation.
- Visit the VPN Provider’s Website: Head to the website of your chosen VPN provider. Many reputable providers offer VPN firmware downloads and installation guides.
- Select Your Router Model: Navigate to the section dedicated to router setup or firmware installation. Choose your router’s model from the list provided.
- Download the Firmware: Download the VPN firmware file specifically designed for your router model. This file will be used during the installation process.
Installing VPN Firmware
The process of installing VPN firmware varies based on your router model and the VPN provider you’ve chosen. Generally, it involves the following steps:
- Access the Admin Panel: Follow the steps outlined in Step 3 to access your router’s admin panel.
- Locate Firmware Update: Look for a section in the admin panel related to firmware updates or router settings. This might be labeled as “Firmware Update,” “Router Upgrade,” or something similar.
- Upload the Firmware: Within the firmware update section, there should be an option to upload or install firmware. Click this option and select the VPN firmware file you downloaded earlier.
- Initiate Installation: Start the installation process. This might involve clicking an “Install” or “Update” button. The router will proceed to replace its existing firmware with the VPN firmware.
- Wait for Completion: The installation process might take a few minutes. Avoid interrupting the process or turning off the router during this time.
- Router Restart: Once the installation is complete, the router might automatically restart. If not, you might need to manually restart the router for the changes to take effect.
Verifying Successful Installation
After installing VPN firmware, ensure that your router is running the new firmware version. You can typically find this information in the router’s admin panel. If the installation was successful, you’re now one step closer to setting up a VPN on your router and enjoying enhanced online security and privacy.
Step 5: Configure VPN Settings
Once the firmware is installed, access your router’s admin panel again. Navigate to the VPN section and input the configuration details provided by your VPN provider. This typically includes the server address, username, and password.
Accessing VPN Configuration Settings
- Access Router Admin Panel: Begin by logging into your router’s admin panel, as outlined in Step 3.
- Locate VPN Settings: In the admin panel, navigate to the section dedicated to VPN settings. This might be labeled “VPN Settings,” “VPN Configuration,” or something similar.
- Input Configuration Details: Here, you’ll need to enter the specific configuration details provided by your VPN provider. These details typically include:
- Server Address: The address of the VPN server you want to connect to. This information is usually provided by your VPN provider.
- Username and Password: The credentials you use to log into your VPN account.
- Protocol: The encryption protocol you want to use, such as OpenVPN or IKEv2.
- Authentication Method: Choose the appropriate authentication method, usually a combination of username and password.
VPN Configuration Considerations
While configuring your VPN settings, keep the following considerations in mind:
- Server Location: Choose a server location that aligns with your browsing needs. If you’re looking to access content from a specific region, select a server in that region.
- Encryption Protocol: Opt for a strong encryption protocol like OpenVPN for optimal security.
- Split Tunneling: Some routers offer split tunneling, which allows you to route only certain traffic through the VPN while keeping other traffic unaffected.
Saving and Applying Settings
Once you’ve entered the necessary configuration details, make sure to save your settings. This might involve clicking an “Apply” or “Save” button within the VPN settings section of the admin panel. After saving, your router will use these settings to establish a secure VPN connection.
Testing the Connection
To ensure that the VPN connection is working correctly, consider the following steps:
- Restart Router: After saving the VPN settings, it’s a good idea to restart the router to apply the changes fully.
- Check Connection Status: In the router admin panel, there should be a section indicating the status of your VPN connection. It should show as “Connected” if the setup was successful.
Step 6: Connect to a VPN Server
Save your settings and restart the router. Once it’s back online, navigate to the VPN section again and connect to a server of your choice. Congratulations! Your router is now safeguarding your online activities.
Navigating to the VPN Settings
- Access Router Admin Panel: Begin by logging into your router’s admin panel, as outlined in Step 3.
- Navigate to VPN Settings: In the admin panel, find the section where you configured your VPN settings in Step 5. This is where you’ll initiate the VPN connection.
- Connect to VPN Server: Within the VPN settings section, you’ll likely find an option to connect to a VPN server. This might be labeled “Connect,” “Activate,” or something similar.
Initiating the VPN Connection
- Select Server: If prompted, choose the VPN server you want to connect to. This could be based on factors like location, speed, or specific content you wish to access.
- Initiate Connection: Click the button to initiate the VPN connection. The router will establish a secure tunnel between itself and the chosen VPN server.
- Wait for Connection: The connection process might take a few moments. During this time, the router is configuring the encrypted pathway to the VPN server.
Verifying Connection
After the connection is established, it’s important to verify that everything is functioning as intended:
- Check Status: In the VPN settings section, you should see that the connection status has changed to “Connected” or a similar indication.
- External IP Address: To ensure the connection is working, you can check your external IP address. It should match the IP address of the VPN server you’ve connected to.
FAQs
Q: Can I use any router for setting up a VPN?
A: Not all routers support VPN installations. Check your router’s compatibility with your chosen VPN provider before proceeding.
Q: Is VPN firmware installation difficult?
A: It can vary based on your technical knowledge and router model. Most VPN providers offer comprehensive installation guides.
Q: Will setting up a VPN slow down my internet speed?
A: While VPNs might slightly reduce your speed due to encryption, a reputable VPN provider will minimize this impact.
Q: Can I switch VPN servers after setup?
A: Yes, you can easily switch servers within your router’s admin panel.
Q: Is my data completely secure with a VPN?
A: While a VPN enhances security, it’s important to choose a trustworthy provider and follow best practices for optimal protection.
Q: Can I use a free VPN for router setup?
A: It’s recommended to use a paid VPN for better security and reliability. Free VPNs often come with limitations and potential risks.
Conclusion
Securing your online presence through a VPN on your router is a proactive measure to ensure your privacy and data integrity. By following the steps outlined in this guide, you can confidently navigate the digital landscape while keeping your sensitive information safe from malicious actors. So go ahead, set up that VPN, and enjoy the peace of mind that comes with browsing the web securely.
Keep Reading :


